Shading Basics for Beginners: Pencil Moisture Control Guide
Whether you’re sketching your first still life or refining the shadows in a portrait, mastering shading is a cornerstone of pencil drawing. But there’s a hidden factor that beginners often overlook—moisture. From sweaty palms to humid studios, moisture can subtly sabotage your shading efforts, smudging lines and warping paper. This beginner guide explores the shading basics with a focus on pencil moisture control, offering practical insights into grip, coatings, and preservation techniques that protect your work and improve your results.
Why Moisture Matters in Pencil Shading
Graphite, the core component of most pencils, behaves differently under varying moisture levels. When combined with the natural oils from your hands or ambient humidity, graphite can smear unpredictably, making it difficult to control tonal transitions. For beginners learning to shade with precision, this can be frustrating.
Excess moisture also affects the paper’s surface. It can cause fibers to swell or degrade, especially if you’re working on lower-quality sketch pads. That’s why understanding how to manage moisture—both from your hand and the environment—is essential to producing clean, controlled shading.
Get a Grip: Ergonomics Meets Moisture Management
Your hand is the primary source of moisture during drawing sessions. A proper ergonomic grip not only reduces fatigue but also minimizes the skin-to-paper contact that leads to smudging. Here are some tips:
- Use a tripod grip: Hold the pencil with your thumb, index, and middle finger, keeping your palm elevated off the paper.
- Try a pencil grip aid: Silicone or foam grips improve comfort and absorb moisture, especially helpful during long sessions.
- Wear a drawing glove: These partial gloves cover the side of your hand, reducing friction and moisture transfer.
In addition, the type of pencil barrel matters. Matte-finished pencils offer better grip and less slip compared to glossy lacquered ones, which can become slick when your hands sweat.
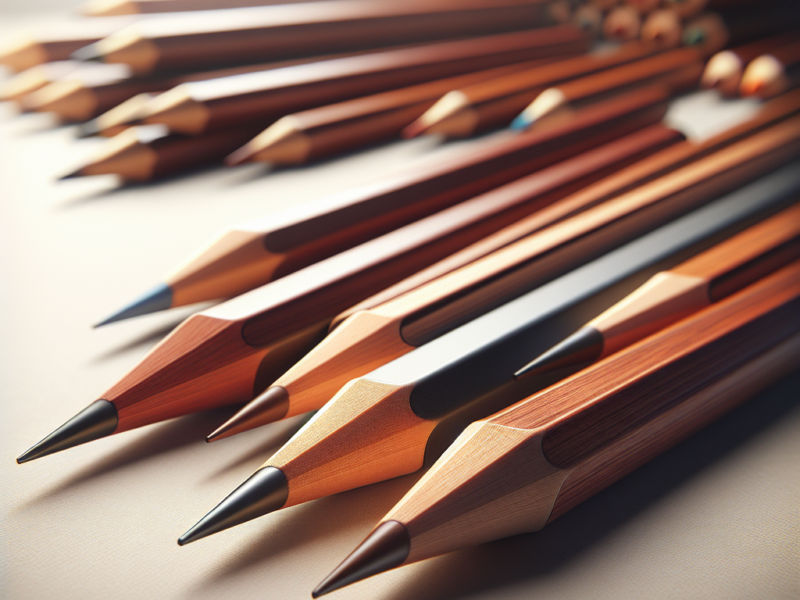
Understanding Pencil Coatings: A Functional Overview
Not all pencils are created equal. The outer coating of a pencil plays a subtle yet significant role in moisture control. Here’s a quick coating overview to help you choose the right tool for the job:
- Matte coatings: These are often used on artist-grade pencils. They provide a tactile surface that resists slipping and absorbs minor hand moisture.
- Glossy lacquers: Common in budget pencils or promotional items. While visually appealing, they can become slippery under humid conditions.
- Natural wood finishes: These offer a raw texture that some artists prefer for better grip. However, they may absorb moisture more readily and degrade over time.
OEM manufacturers often tailor coatings to specific markets—school pencils typically favor durability and cost, while professional lines focus on tactile feedback and moisture resistance. When selecting pencils for shading, opt for those with matte or semi-matte finishes to maximize control.
Shading Techniques That Minimize Smudging
Even with the right pencil and grip, your technique matters. Beginners should focus on controlled hand movements and shading approaches that reduce the risk of smearing:
- Work from top left to bottom right (or the reverse if you’re left-handed) to avoid dragging your hand across shaded areas.
- Use light layers: Build up tone gradually instead of applying heavy pressure all at once. This helps graphite adhere better and reduces loose particles.
- Use a scrap paper barrier: Place a clean sheet under your drawing hand to block direct contact with the artwork.
These techniques, combined with moisture-conscious tools, form a solid foundation for clean, professional-looking shading.
Preserving Your Pencil Work: Moisture Defense Strategies
Once your drawing is complete, protecting it from environmental moisture becomes the next priority. Pencil drawings are particularly vulnerable to smudging and degradation over time. Fortunately, there are proven methods to safeguard your work.
According to Beechmore Books, one of the most effective strategies is sealing the back of your drawing with acid-free artist tape using a tape runner. This creates a barrier that helps prevent moisture penetration from behind, especially when mounted or framed.
Other preservation techniques include:
- Fixative sprays: These bond graphite to the paper, locking in your shading without altering the texture. Use in a well-ventilated area and test on a scrap sheet first.
- Parchment overlays: Placing a sheet of parchment or glassine over your drawing protects it from dust and finger oils during storage.
- Archival storage: Use acid-free folders or portfolios to prevent yellowing and paper breakdown over time.
These methods are simple yet powerful, ensuring that your hard work isn’t undone by humidity or careless handling.
Choosing the Right Paper for Moisture-Sensitive Shading
The paper you use plays a critical role in how graphite behaves. For moisture control, look for papers with the following characteristics:
- High cotton content: Cotton-based papers resist warping and absorb graphite more evenly.
- Acid-free: Prevents long-term degradation and is less reactive to environmental changes.
- Medium tooth: Offers enough texture to hold graphite without excessive dusting or smudging.
Heavier paper weights (above 120gsm) are also preferable, especially in humid climates, as they resist curling and provide a more stable surface for shading.
Environmental Factors: Studio Setup and Climate Control
Controlling moisture in your drawing environment is just as important as your tools and techniques. If you live in a humid region or draw in a basement studio, consider the following:
- Use a dehumidifier: Keeps air moisture levels stable, protecting both your paper and pencils.
- Store art vertically: Prevents pressure-induced smudging and reduces surface contact.
- Keep tools dry: Store pencils in closed containers or cases to avoid moisture absorption, especially natural wood pencils.
These small adjustments can make a significant difference in the longevity and quality of your sketches.
From Manufacturer to Artist: How Quality Control Impacts Moisture Performance
Behind every pencil is a manufacturing process that directly affects how it handles moisture. OEM pencil producers often apply multiple layers of coating and bake them at specific temperatures to ensure durability and moisture resistance. The core itself—usually a blend of graphite and clay—is calibrated for hardness and smoothness, but also for how it reacts under various conditions.
Higher-end pencils undergo stricter quality control, including humidity testing and coating adhesion checks. This is why professional-grade pencils maintain consistent performance across environments, while cheaper alternatives may feel unpredictable or degrade faster.
For those interested in the technical side of pencil production, this overview from Pencils.com offers a fascinating look into the manufacturing pipeline—from graphite mixing to final packaging.
Conclusion: Moisture Control as a Core Skill in Shading
Learning to shade effectively involves more than just practicing gradients—it’s about controlling every variable that affects your medium. Moisture, often underestimated, can make or break a drawing. By understanding how to manage it through ergonomic grip, smart pencil selection, coating knowledge, and proper preservation, beginners can elevate their shading technique while protecting their work for years to come.
As you continue your artistic journey, remember: clean shading starts with clean habits. And when in doubt, keep a glove, a fixative, and a dry workspace close at hand.