Achieving exceptional results in graphite drawing hinges on one often overlooked yet critical factor: graphite flow smoothness. Whether you’re sketching light outlines or rendering deep shadows, the way graphite transfers from pencil to paper determines the final quality of your artwork. For artists, illustrators, and even pencil manufacturers, understanding how to enhance this flow can unlock new levels of control, precision, and aesthetic appeal. In this article, we’ll explore the science and technique behind smooth graphite application, offering both practical advice and technical insights for improving your drawing experience.
Understanding Graphite Flow: What It Really Means
Graphite flow smoothness refers to the consistency and ease with which graphite particles are deposited onto a drawing surface. It’s influenced by multiple factors, including pencil composition, paper texture, drawing technique, and environmental conditions. A smooth flow allows for seamless shading, cleaner transitions, and more predictable results—essential for both fine detail work and expressive rendering. When graphite flow is uneven or gritty, it can lead to blotchy textures, broken lines, and frustrating inconsistencies.
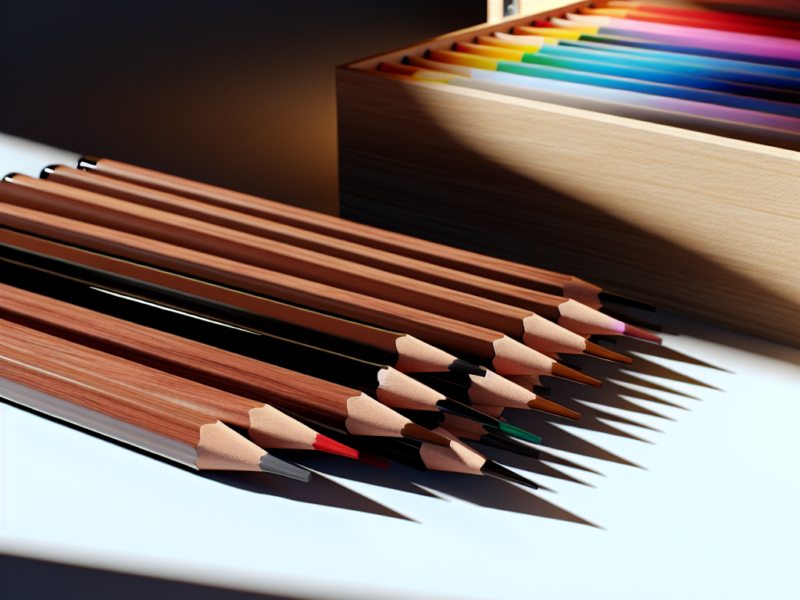
The Role of Pencil Composition: Graphite and Clay Ratios
At the core of every pencil is a blend of graphite and clay. This composition directly affects how the lead behaves on paper. Softer pencils (e.g., 6B to 2B) contain more graphite and less clay, resulting in darker, smoother marks. Harder pencils (e.g., H to 4H) have higher clay content, making them better suited for fine lines but less ideal for smooth shading.
| Pencil Grade | Graphite Content | Clay Content | Best Use |
|---|---|---|---|
| 6B | High | Low | Rich shading, dark tones |
| 2B | Moderate-High | Moderate | General sketching, smooth gradients |
| HB | Balanced | Balanced | Writing, basic drawing |
| 2H | Low | High | Technical drawing, fine detail |
According to The Science Behind Pencil Lead, understanding this composition allows artists to select the right pencil for their desired effect, ensuring optimal graphite flow across different drawing scenarios.
Paper Texture and Surface Interaction
The texture of your drawing surface—often referred to as the paper’s “tooth”—plays a fundamental role in how graphite adheres. Rougher papers have more pronounced fibers, which can catch and hold graphite particles, enhancing texture but potentially reducing smoothness. Smoother papers allow for finer detail and more fluid graphite application.
A study titled Vertically and Horizontally Drawing Formation of Graphite explored this interaction, showing that surface roughness increases friction, which can disrupt the uniformity of graphite deposition. Choosing the right paper for your technique—hot press for smooth shading, cold press for textured effects—can dramatically improve your control over graphite flow.
Sharpening Strategy: The Impact of Pencil Tips
One of the simplest yet most effective ways to enhance graphite flow smoothness is by maintaining a sharp pencil tip. A fine point allows graphite to reach into the micro-textures of the paper, reducing gaps and inconsistencies in shading. Artists who frequently sharpen their pencils can achieve more uniform coverage and better edge control.
As highlighted in 5 Tips for Smooth Shading with Graphite, a sharp point is essential for laying down even layers of graphite, especially when working with light pressure. Using a sandpaper block or mechanical sharpener can help maintain the ideal tip shape throughout a drawing session.
Technique Matters: Strokes, Pressure, and Layering
Even with the perfect pencil and paper, technique remains a critical factor in achieving smooth graphite application. Here are several proven methods:
- Circular strokes: Using small, overlapping circles helps distribute graphite evenly, reducing visible stroke lines.
- Consistent pressure: Applying uniform pressure prevents patchy areas and helps build smooth gradients.
- Layering: Instead of pressing hard, apply multiple light layers to build depth gradually. This preserves paper texture and improves control.
These techniques, as described in Graphite Drawing Techniques, allow artists to create seamless tonal transitions and professional-quality textures.
Lighting and Visibility: Seeing the Flow
Proper lighting can significantly influence how well you manage graphite flow. Natural daylight or high-CRI (Color Rendering Index) LED lamps help you see subtle tonal differences and surface textures more clearly. Poor lighting can cause you to misjudge values, leading to uneven application and overworked areas.
Position your light source at an angle that minimizes glare and shadow. This setup ensures you can monitor the graphite’s interaction with the paper in real time, making adjustments as needed for smoother results.
Environmental Factors: Humidity and Temperature
Few artists consider how environmental conditions affect graphite flow. High humidity can soften paper fibers, increasing drag and making graphite harder to control. Conversely, dry conditions may reduce paper grip, causing the pencil to slide and skip.
To maintain optimal working conditions:
- Store paper and pencils in a stable, dry environment
- Use a drawing board to isolate your work from moisture on surfaces
- Consider using fixatives between layers to preserve graphite texture
Monitoring your studio’s climate can help maintain consistent graphite behavior across sessions.
Choosing the Right Pencil for the Task
Different drawing stages demand different pencil grades. Here’s a breakdown of how to match pencil types with drawing objectives:
| Drawing Task | Recommended Pencil | Reason |
|---|---|---|
| Initial Sketching | H or 2H | Light lines, easy to erase |
| Mid-tone Shading | HB or 2B | Balanced flow and tone |
| Deep Shadows | 4B to 6B | Rich, smooth coverage |
| Detail Work | 2H to HB | Precision and control |
Experimenting with various grades, as encouraged in Mastering Graphite Drawing Techniques, helps artists discover the combinations that best suit their style and subject matter.
Understanding Light and Shadow for Better Flow Control
Shading is not just about filling space—it’s about interpreting light. A solid grasp of light theory allows you to apply graphite more intentionally, enhancing flow and realism. In A Beginners Guide to Light & Shadow, artists are taught to observe how light direction impacts form and contrast. This awareness leads to better shading decisions, smoother transitions, and more dynamic compositions.
By visualizing the light source and understanding form, you can apply graphite in a way that mimics natural lighting, creating depth and volume with greater fluidity.
Common Mistakes That Disrupt Graphite Flow
Even experienced artists can fall into habits that hinder smooth graphite application. Here are some pitfalls to avoid:
- Overworking an area: Excessive layering can damage the paper’s surface, leading to blotchy results.
- Dirty tools: Graphite dust on your hands or blending tools can cause smudging and uneven tones.
- Inconsistent sharpening: A dull pencil tip leads to scratchy lines and poor coverage.
- Ignoring paper grain: Drawing against the grain can result in broken lines and rough textures.
Awareness of these issues allows for cleaner, more controlled graphite flow and better final outcomes.
Manufacturing Perspective: Engineering Smooth Graphite Leads
From a production standpoint, achieving smooth graphite flow begins long before the pencil reaches your hand. Manufacturers carefully calibrate the graphite-clay ratio, firing temperature, and extrusion process to produce leads with consistent density and texture. High-end pencil brands often incorporate waxes or polymers into the lead to reduce friction and enhance flow.
Quality control measures—such as testing lead breakage resistance, smoothness on various papers, and uniformity of graphite dispersion—are essential in ensuring that artists receive a reliable product. OEMs (Original Equipment Manufacturers) consider user feedback and lab testing to refine formulations that maximize both performance and durability.
Final Thoughts: Mastery Through Materials and Method
Improving graphite flow smoothness is both an art and a science. By understanding the materials you use, refining your technique, and optimizing your environment, you can achieve cleaner, more expressive drawings. Whether you’re a beginner learning the basics or a seasoned artist fine-tuning your process, focusing on graphite flow can elevate your work from good to exceptional.
For further reading and deeper insights, explore these resources:
- Graphite Drawing Techniques – Pencil Drawing
- 5 Tips for Smooth Shading with Graphite
- The Science Behind Pencil Lead
- A Beginners Guide to Light & Shadow